Your water heater is one of your house appliances that serve a lot of benefits for your home. It gives hot water needed for your hot drinks, showers, baths, laundry, and dishes. Every part of it is important especially the water heater thermocouple. But what if it suddenly dysfunctions and needs replacement? Can you replace it by yourself? If you can’t, let us tell you how.

What does a water heater thermocouple do?
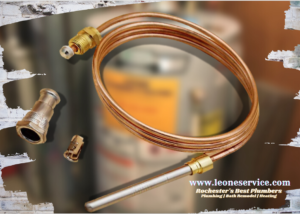
Before you perform water heater thermocouple replacement, you need to know what a water heater thermocouple does. It is one of the important parts of your water heater. This part transforms heat from a flame into a minimal electric current. It works like a switch to regulate gas flow from the gas supply valve.
The 5 Easy Steps For Water Heater Thermocouple Replacement
Now that you know what a water heater thermocouple does, it’s time to get your hands working. Here are the easy steps for water heater thermocouple replacement.
1. Turn off your gas supply.
For your safety, make sure that the gas control valve is turned off before you start.
2. Remove the burner access covers.
Normally, the burner just slides out since it sits loosely. You first need to detach the nuts that are holding the thermocouple and the two tubes to the valve.
3. Detach the thermocouple.
The thermocouple is typically snapped into place to the pilot gas supply with one or more clips. The end of it is inserted within the pilot assembly which you can pull out easily. Be reminded of how the old thermocouple is placed (take pictures) since this is important for step number 4.
Note: Make sure that you got the correct part for your water heater thermocouple replacement. Bring along with you the detached
thermocouple when you buy one at a hardware store.
4. Install the new thermocouple.
You need to make sure that you install the thermocouple the same way as how the old one was placed. To test, turn on the control valve. Your water heater should be back working.
5. Turn the gas back on.
Please follow the water heater lighting instructions once the gas is turned on. Watch out for gas leaks! You can check by putting soapy water into joints. If you see bubbles while the main burner is firing, it means gas is leaking.
Do you still need help?
If you encounter something odd on your water heater such as gas leaks, we are here to help.
Reach out to us anytime!
| Photo Credit: Edited in
Canva, Photo by
Charlotte May from
Pexels