The Essential Tips for Effective Water Leak Repair

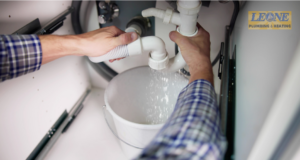
  Professional water leak repair service by Leone Plumbing

Did you know that a small water leak can waste up to 10,000 gallons of water in a single year? Not only is this detrimental to the environment, but it can also lead to skyrocketing water bills. If you’re tired of wasting water and money, it’s time to take action. In this article, we’ll share the essential tips for effective water leak repair.

From identifying leaks to fixing them promptly, we’ll provide you with practical and cost-effective solutions to prevent water waste in your home. By following these tips, you’ll not only save water but also contribute to conserving the planet’s vital resources. Don’t let a small leak turn into a big problem. Join us as we dive into the world of water leak repair and empower you to take control of your water usage.

The Importance of Water Leak Repair

Water leak repair is crucial for several reasons. Firstly, it helps to conserve one of our most precious resources – water. With water scarcity becoming an increasingly pressing issue worldwide, it’s essential that we do our part to minimize waste. By repairing leaks promptly, you can significantly reduce the amount of water wasted in your home.

Secondly, water leaks can lead to significant financial losses. Even a small leak can cause your water bills to skyrocket. By fixing leaks, you can save money in the long run and avoid unnecessary expenses.

Moreover, water leaks can cause damage to your property. Moisture can lead to mold growth, rotting wood, and structural damage, which can be expensive and time-consuming to repair. Taking care of leaks promptly can help prevent these issues and maintain the integrity of your home.

Common Causes of Water Leaks

Water leaks can occur due to various reasons. Understanding the common causes can help you identify and prevent leaks in your home.

One of the most common causes of water leaks is worn-out or faulty plumbing fixtures. Over time, rubber seals, gaskets, and washers can deteriorate, causing leaks. Faucets, showerheads, and toilet flappers are common culprits. Regularly inspecting and maintaining these fixtures can help prevent leaks.

Another common cause is pipe damage. Pipes can develop cracks or leaks due to age, corrosion, or external factors like tree root growth. Freezing temperatures can also cause pipes to burst. Inspecting your pipes regularly and addressing any issues promptly can help prevent water leaks.

Poor installation can also lead to water leaks. If plumbing fixtures or pipes are not installed correctly, they may not be properly sealed or connected. This can result in leaks over time. Hiring a professional plumber for installations can help prevent these issues.

Signs of a Water Leak
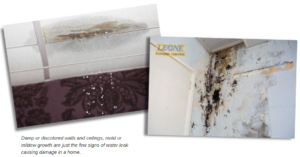
Leone Plumbing services for water leak repair Detecting water leaks early is crucial for timely repair. Here are some common signs that indicate you may have a water leak in your home:
  1. Unexplained Increase in Water Bills: If you notice a sudden spike in your water bills without any change in your water usage, it could be a sign of a leak. Is your water meter running?
 
  1. Damp or Discolored Walls and Ceilings: Water leaks can cause moisture to seep into walls and ceilings, leading to dampness or discoloration.
 
  1. Mold or Mildew Growth: Excess moisture from leaks can create an ideal environment for mold and mildew to thrive. If you notice mold or mildew in your home, it may indicate a water leak.
 
  1. Musty Odors: Water leaks can cause a musty smell in the affected area. If you notice a persistent musty odor, it’s worth investigating for leaks.
 
  1. Pooling Water or Puddles: Obvious signs of a leak include puddles or pooling water in or around your home. This may indicate a burst pipe or a leaky plumbing fixture.
If you notice any of these signs, it’s important to investigate further and take appropriate action to repair the leak.  

Tips for Effective Water Leak Repair

Now that you know the common causes and signs of water leaks, it is time that we talk about the essential tips for an effective water leak repair.
  1. Identify the Source of the Leak:
    • Thoroughly inspect the area to determine where the leak originates. Common sources include faucets, pipes, toilets, and water heaters. Use tools like moisture meters and dye tablets to pinpoint the exact location of the leak.
  2. Turn Off the Water Supply:
    • Before beginning any repair work, shut off the water supply to prevent further water damage. This might involve closing a local shut-off valve or turning off the main water supply to the house. Ensure all water fixtures are drained by opening the faucets and flushing toilets.
  3. Use the Right Tools and Materials:
    • Equip yourself with the appropriate tools and repair materials. Depending on the type of leak, you might need pipe wrenches, Teflon tape, pipe repair clamps, epoxy putty, or replacement parts. Always choose high-quality materials to ensure a long-lasting repair.
  4. Follow Proper Repair Techniques:
    • Adhere to standard repair procedures for the specific type of leak. For example, if dealing with a leaking pipe joint, ensure you apply Teflon tape correctly and tighten the joint adequately. For patching holes, clean the area thoroughly and apply the patching material as directed by the manufacturer.
  5. Test the Repair and Monitor for Recurrence:
    • After completing the repair, gradually turn the water supply back on and observe the area for any signs of continued leaking. Check all connections and repaired areas to ensure they are watertight. Monitor the area over the next few days to ensure the leak has been fully resolved and to catch any early signs of recurrence.
By following these tips, you can effectively repair water leaks and prevent future water damage to your property.

DIY Water Leak Repair Tips

While some water leaks may require professional assistance, there are several DIY tips you can follow to repair minor leaks yourself. Here are some effective DIY water leak repair tips:  
  1. Fixing a Dripping Faucet: A dripping faucet is not only annoying, it is wasteful. Faucet leaks can occur when there is a worn-out or faulty rubber washer. Turn off the water supply, remove the faucet handle and stem, and replace the washer. Reassemble the faucet, and the leak should be fixed.
 
  1. Repairing a Leaky Toilet: A toilet with a minor leak can waste 30-250 gallons of water a day. To fix a leaky toilet, start by turning off the water supply. Remove the tank lid and inspect the flapper. If it’s damaged or worn out, replace it with a new one. Additionally, check the float on the fill valve and adjust it if necessary. Turn on the water supply, and the leak should be resolved.
 
  1. Sealing Leaky Pipe Joints: Pipe joints can develop leaks due to loose connections or worn-out sealing material. Start by turning off the water supply. Disconnect fittings, clean the joint thoroughly and apply plumber’s tape or pipe sealant. Tighten the joint securely, and turn on the water supply to check for any further leaks.
 
  1. Replacing Faulty Showerheads: Leaky showerheads can waste a significant amount of water. If your showerhead is leaking, remove it and inspect the washer and O-ring. If they’re damaged, replace them. Apply the plumber’s tape to the shower arm threads and reattach the showerhead securely.
 
  1. Fixing a Leaking Washing Machine Hose: Leaks in washing machine hoses can cause water damage. Turn off the water supply and unplug the machine. Inspect the hoses for cracks or bulges. If any issues are found, replace the hose with a new one and tighten the connections.
Remember to always turn off the water supply before attempting any DIY repairs and consult professional help if you’re unsure or if the leak persists.

When to Hire a Professional for Water Leak Repair
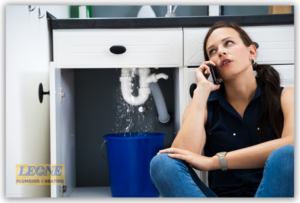
Staying Calm In Dealing With Plumbing EmergenciesWhile minor leaks can often be handled with a DIY approach, there are situations where hiring a professional is the best course of action. Professionals bring the expertise, tools, and experience necessary to handle complex, persistent, or major leaks safely and effectively. By recognizing when to seek professional help, homeowners can protect their property from extensive damage and ensure the longevity and reliability of their plumbing systems. If you are in the Rochester, New York area and looking for a reliable and trusted plumber to fix your water leak concern, contact us, and we are here to help! We are a team of professional plumbers here in Rochester, New York, dedicated to providing top-notch plumbing services to our community. Whether you’re dealing with persistent water leaks, clogged drains, faulty water heaters, or any other plumbing issues, our experienced and skilled team is here to help. We pride ourselves on our prompt, reliable service and commitment to customer satisfaction, ensuring that your plumbing systems are functioning efficiently and effectively. Trust us to handle all your plumbing needs with the expertise and care you deserve.
Read More

Saving Your Home from Corroded Pipes

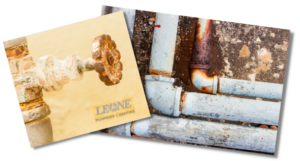
Leone Plumbing corroded pipes repair serviceAre you aware that corroded pipes could be silently damaging your home? If left unchecked, corroded pipes can lead to costly repairs, cause water leaks, and even create potential health hazards. That’s why early detection and proper maintenance of your plumbing system are crucial. In this article, we will share expert tips on how you can save your home from the perils of corroded pipes.
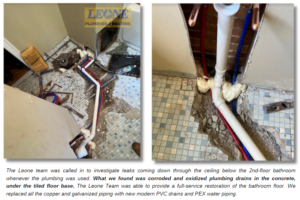
The Importance Of Early Detection And Proper Maintenance For Home Pipes

Maintaining the integrity of your home’s plumbing system is essential to protect your investment and ensure the comfort and safety of your family. Corroded pipes can wreak havoc on your property, leading to a host of issues that can be both financially and emotionally draining. By taking proactive measures and staying vigilant, you can save your home from the damaging effects of corroded pipes. Corrosion occurs when metal pipes interact with various factors such as water, chemicals, and even the soil surrounding them. Over time, this interaction leads to a breakdown of the pipe’s structure, causing leaks, reduced water pressure, and potential health risks due to contaminated water. Early detection is key to minimizing the extent of damage and preventing further complications.

Proper maintenance is equally important in ensuring the longevity of your plumbing system. Regular inspections, routine maintenance, and prompt repairs are essential to prevent corrosion from taking hold and causing significant damage. By investing time and effort in early detection and proper maintenance, you can save yourself from the headaches and financial burden associated with corroded pipes.

Common Causes Of Pipe Corrosion

Understanding the root causes of pipe corrosion is essential in preventing and managing this destructive issue. Various factors contribute to the corrosion of pipes, including:

Age of Your Home
Older homes often have plumbing systems that are more susceptible to corrosion due to the materials used at the time of construction. Galvanized steel pipes, commonly found in older properties, tend to corrode more rapidly than newer materials such as copper or PEX.
Water Quality
The quality of the water flowing through your pipes can significantly impact their lifespan. High levels of acidity, alkalinity, or mineral content can accelerate the corrosion process. Additionally, water with high chloride or sulfate levels can be particularly corrosive to certain metals.
Chemicals and Environmental Factors

Exposure to harsh chemicals, such as cleaning agents or fertilizers, can corrode pipes over time. Environmental factors, such as high humidity or soil acidity, can also contribute to accelerated corrosion rates.

Signs of Corroded Pipes

Now that you’re aware of the causes, let’s explore the telltale signs that indicate your pipes may be corroded. Early detection of corroded pipes is crucial in preventing further damage and costly repairs. By being aware of the following signs, you can proactively address any issues before they escalate:

Discolored Water

If you notice a change in the color of your tap water, such as brown or yellowish tones, it could be an indication of corroded pipes. The presence of rust or other contaminants in the water is a clear sign that your pipes are deteriorating.

Low Water Pressure

Reduced water pressure can be a result of corroded pipes. As the pipes degrade, they become narrower, restricting the flow of water. If you’re experiencing consistently low water pressure throughout your home, it’s worth investigating the condition of your pipes.

Frequent Leaks

Corroded pipes are more prone to developing leaks. If you notice recurring leaks in your plumbing system, it’s a strong indication that the pipes are deteriorating and in need of attention. Ignoring these leaks can lead to extensive water damage and mold growth.

Preventive Maintenance Tips For Pipe Longevity

Proactive maintenance is key to preventing pipe corrosion and extending the lifespan of your plumbing system. Here are essential tips for maintaining healthy pipes:

  1. Regular Cleaning: Flush your pipes periodically by running hot water through them to remove any built-up sediment or debris. This simple maintenance practice helps prevent corrosion-causing particles from accumulating and damaging your pipes.
  2. Water Softening: If your water supply has a high mineral content, consider installing a water softener. Water softeners remove excess minerals that can contribute to pipe corrosion, thereby protecting your plumbing system.
  3. Avoid Harsh Chemicals: Be mindful of the cleaning agents and chemicals you use in your home. Harsh chemicals can corrode pipes over time. Opt for environmentally friendly alternatives and avoid pouring corrosive substances down drains or toilets.

Implementing these preventative measures can significantly reduce the risk of pipe corrosion. However, in cases where corrosion has already taken hold, repair or replacement may be necessary.

Replacing Corroded Pipes

In severe cases of corrosion, pipe replacement may be the most suitable solution. This involves removing the corroded pipes and installing new ones made from materials resistant to corrosion. When it comes to pipe replacement, selecting the right materials is crucial for long-term durability and corrosion resistance. Here are two widely used options:

  1. Copper Pipes: Copper pipes have long been a popular choice due to their excellent corrosion resistance and durability. They are suitable for both hot and cold water supply lines and have a proven track record of reliability.
  2. PEX Pipes:  Cross-linked polyethylene (PEX) pipes are gaining popularity for their flexibility, ease of installation, and resistance to corrosion. PEX pipes are highly durable and suitable for both residential and commercial applications.

Hiring A Professional Plumber For Pipe Maintenance And Repairs

While DIY methods and proactive maintenance play a crucial role in preventing pipe corrosion, there are situations where professional expertise is necessary. Hiring a professional plumber offers several benefits:

  1. Expert Knowledge: Professional plumbers possess specialized knowledge and experience in identifying, addressing, and preventing pipe corrosion. Their expertise ensures accurate assessments and effective solutions for your plumbing system.
  2. Time and Cost Savings: Engaging a professional plumber saves you time and money in the long run. Their efficient repairs and proactive maintenance help prevent extensive damage and costly repairs down the line.
  3. Peace of Mind: By entrusting your plumbing system to a professional, you can have peace of mind knowing that your pipes are in capable hands. Professional plumbers adhere to industry standards and deliver quality workmanship.
How Leone plumbing deal with corroded pipes issue As Rochester, New York’s best plumbers, it is our goal to help you protect your home and your business from the perils of corroded pipes. We provide the right solution for your plumbing pipe maintenance and repair concerns. Don’t wait for problems to arise – start protecting your home today! Contact us and schedule an appointment.  
Read More

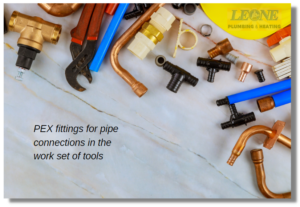
How to Properly Install PEX Pipe For A Leak-Free Home

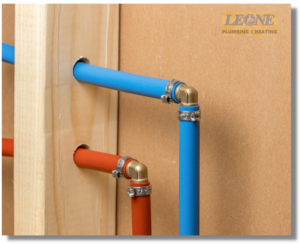
Installing PEX pipe professionally done by Leone Plumbing

Installing the right plumbing system is essential for a leak-free and hassle-free home. And when it comes to choosing the best piping material, PEX (cross-linked polyethylene) pipes are gaining popularity for all the right reasons. With their excellent flexibility, durability, and resistance to freezing, PEX pipes have become a preferred choice for homeowners and contractors alike. But proper installation is key to ensuring their leak-free performance. In this comprehensive guide, we will walk you through the step-by-step process of installing PEX pipes, from preparing the materials to connecting the fittings. We will also discuss the importance of using the right tools and techniques to achieve secure and reliable connections.

Advantages Of Using PEX Pipe For Plumbing

Another advantage of PEX pipe is its durability. Unlike copper, PEX pipe does not corrode or develop pinhole leaks over time. It is also resistant to scale build-up, ensuring consistent water flow and reducing the need for maintenance. PEX pipe is also quieter compared to metal pipes, as it absorbs water hammer and minimizes noise transmission. Moreover, PEX pipe is less expensive than copper, making it a cost-effective choice for plumbing projects.

Types Of PEX Pipe

Before you begin your PEX pipe installation, it is important to understand the different types and sizes of PEX pipe available. PEX pipe comes in three main types: PEX-A, PEX-B, and PEX-C. Each type has its unique characteristics and uses.

  • PEX-A is the most flexible type of PEX pipe and can withstand repeated bending without losing its shape. This makes it ideal for installations that require many bends and curves.
  • PEX-B is slightly less flexible than PEX-A but still offers excellent durability and reliability.
  • PEX-C is the least flexible type, but it is also the most affordable option.

PEX Pipe Sizes

In terms of sizes, PEX pipe is available in various diameters, commonly ranging from 3/8 inch to 1 inch. The size you choose will depend on the water flow requirements of your plumbing system. It is important to select the appropriate size to ensure proper water pressure and flow.

When purchasing PEX pipe, be sure to check for industry certifications, such as the NSF (National Sanitation Foundation) certification, to ensure that the pipe meets quality standards and is suitable for potable water applications.

Step-By-Step Guide To Installing PEX Pipe

Before you begin installing PEX pipes, there are a few important steps you need to take to ensure a smooth and efficient installation process. Here’s what you need to do:

1. Plan your plumbing system: Determine the layout of your plumbing system, including the location of fixtures, supply lines, and drains. This will help you calculate the amount of PEX pipe and fittings you will need for the project.

2. Shut off the water supply: Before you start any plumbing work, make sure to shut off the main water supply to your home. This will prevent any accidents or water damage during the installation process.

3. Remove old pipes if necessary: If you are replacing an existing plumbing system, you will need to remove the old pipes before installing the PEX pipe. Follow proper procedures for removing old pipes, such as draining the water and using appropriate tools.

4. Prepare the work area: Clear the work area of any obstacles and ensure you have enough space to maneuver and work comfortably. Lay down protective sheets or tarps to protect the flooring or surfaces from any potential damage.

By properly preparing for the PEX pipe installation, you can minimize any potential issues and ensure a successful and efficient installation process.

Tips For Avoiding Leaks During PEX Pipe Installation Tools for Installing PEX Pipe

Now that you have prepared for the PEX pipe installation, it’s time to dive into the step-by-step process. Follow these instructions to properly install PEX pipe for a leak-free plumbing system:

1. Measure and cut the PEX pipe: Measure the length of the pipe needed for each section of the plumbing system. Use a PEX cutting tool to make clean and straight cuts. Be sure to deburr the cut ends to remove any rough edges.

2. Insert the fittings: Slide a PEX sleeve onto the end of the PEX pipe. Insert the PEX fitting into the end of the pipe until it reaches the shoulder of the fitting. Ensure that the fitting is fully inserted and seated properly.

3. Crimp the connection: Use a PEX crimping tool to crimp the PEX ring around the fitting. Position the crimping tool over the crimp ring and squeeze the handles firmly until the tool is released. Repeat the crimping process on the other end of the fitting to create a secure connection.

4. Secure the PEX pipe: Use pipe hangers to secure the PEX pipe to the framing or other structural elements. Make sure to leave enough room for the pipe to expand and contract with temperature changes.

5. Connect the PEX pipe to fixtures and appliances: Use PEX fittings to connect the PEX pipe to fixtures, such as faucets and toilets, as well as appliances, such as water heaters and washing machines. Follow the manufacturer’s instructions for each specific connection.

6. Install the PEX manifold: If you are using a PEX manifold, install it in a central location and connect the PEX pipes to the manifold using appropriate fittings. The manifold will allow you to control the flow of water to different areas of the plumbing system.

7. Insulate the PEX pipes: Wrap pipe insulation around the PEX pipes to prevent freezing and reduce heat loss. Pay special attention to pipes located in unheated areas or near exterior walls.

By following these step-by-step instructions, you can ensure a proper and secure installation of PEX pipe for a leak-free plumbing system.

Maintaining And Troubleshooting PEX Pipe Systems

Once you have completed the installation of the PEX pipe, it is important to test and inspect the connections to ensure their integrity. Follow these steps to test and inspect the PEX pipe connections:

1. Close all fixtures and appliances: Make sure all faucets, toilets, and other fixtures are turned off. This will isolate the PEX pipe system and allow you to test the connections effectively.

2. Pressurize the system: Use a pressure gauge and a suitable pump to pressurize the PEX pipe system. Follow the manufacturer’s instructions for the specific pressure requirements of your system.

3. Inspect for leaks: Once the system is pressurized, visually inspect all the connections for any signs of leaks. Check the fittings, crimps, and sleeves for any water seepage or drips. If you notice any leaks, mark the location for repair.

4. Repair any leaks: If you find any leaks during the inspection, you will need to repair them immediately. Cut out the faulty section of the PEX pipe and replace it with a new one. Follow the proper procedures for cutting and connecting the new pipe.

5. Re-test the system: After repairing any leaks, re-pressurize the system and re-inspect all the connections. Make sure there are no new leaks and that all the connections are secure and leak-free.

By testing and inspecting the PEX pipe connections, you can identify and address any leaks before they cause significant damage to your plumbing system or property.

Installing PEX Pipe With A Professional

In the event of any problems or issues with installing your PEX pipe system, it is recommended to consult a professional plumber or the manufacturer for troubleshooting and repair guidance. As a team of experienced professional plumbers in the Rochester New York area, we are committed to providing you with quality PEX pipe installation. For your PEX pipe installation needs, contact us, and we are here to help!

Read More

The Advantages and Process of Drain Camera Inspection Services

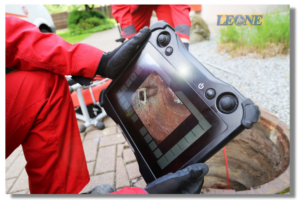
Leone Plumbing drain camera inspection services in Rochester New YorkWhen it comes to plumbing issues, finding the root cause can often be a challenge. That’s where drain camera inspection services come in. By peering into the depths of your pipes with the help of advanced camera technology, these services offer a clear view of what’s happening underground. Using state-of-the-art equipment, drain camera inspections provide homeowners and businesses with a thorough assessment of their plumbing systems. This advanced approach allows for quicker identification of clogs, leaks, and other potential problems, saving time and money in the long run. By combining cutting-edge technology with expert analysis, these services empower individuals to make informed decisions about their plumbing systems, leading to more efficient and cost-effective solutions.

The Advantages Of Drain Camera Inspection Services

Drain camera inspection services offer several advantages over traditional plumbing diagnostic methods.

Provide Accurate And Precise Results

Firstly, they provide accurate and precise results. The high-resolution cameras used in drain camera inspections capture clear images and videos of the inside of pipes, allowing professionals to identify the exact location and nature of the problem. This eliminates the guesswork involved in traditional diagnostic approaches and ensures that the correct solution is implemented from the start.

Eliminate Invasive Procedures

Secondly, drain camera inspections eliminate the need for invasive procedures like digging or tearing down walls. In the past, diagnosing plumbing issues often required destructive methods, resulting in additional costs and inconvenience for homeowners. With drain camera inspection services, professionals can visually inspect the pipes without causing any damage to the property. This non-invasive approach not only saves time and money but also minimizes disruption to the daily lives of individuals.

Provide Thorough And Accurate Diagnostics

The detailed images and videos captured during drain camera inspections provide transparency and thorough documentation. Homeowners and businesses can view the real-time footage or saved recordings, allowing them to see the condition of their pipes firsthand. This transparency builds trust between the service provider and the customer and ensures that all parties involved have a clear understanding of the problem and its solution. Additionally, the documented evidence can be useful for insurance claims or future reference.

Common Issues Detected By Drain Camera Inspections

Drain camera inspections are capable of identifying a wide range of plumbing issues that may not be easily detectable through other means. Some of the most common issues detected by these inspections include:

1. Clogs:

Drain camera inspections can pinpoint the exact location and cause of clogs within the pipes. Whether it’s a buildup of grease, hair, or foreign objects, the camera provides a clear view of the obstruction, enabling professionals to determine the most appropriate method of removal.

2. Leaks:

Pipe leaks can be difficult to detect, especially if they are hidden behind walls or underground. Drain camera inspections allow for visual confirmation of leaks, helping professionals identify the extent of the damage and plan the necessary repairs.

3. Cracks and Damage:

Over time, pipes can develop cracks, fractures, or other forms of damage that may go unnoticed without a drain camera inspection. By examining the interior of the pipes, professionals can identify any structural issues and take appropriate action to prevent further damage or leaks.

4. Root Intrusions:

Tree roots tend to grow towards sources of water, including underground pipes. These root intrusions can cause blockages and damage to the pipes, leading to reduced water flow and potential leaks. Drain camera inspections can detect and locate these root intrusions, allowing for targeted root removal and pipe repair.

5. Misaligned or Collapsed Pipes:

Drain camera inspections can reveal any misaligned or collapsed sections of pipes. This information is crucial for determining the best course of action, whether it’s repairing the affected section or replacing the entire pipe.

The Importance Of Regular Drain Camera Inspection Services

Drain camera inspections involve a systematic process that utilizes specialized equipment and skilled professionals. Scheduling a regular drain camera inspection service is one way that you can prevent the worst plumbing issues or repair those ongoing and recurring problems on your drain. If you are looking for a tested and proven drain camera inspection service in Rochester, New York our team of expert plumbers is ready to help you! Contact us today to book an appointment.
Read More

Deciding Between Water Heater Repair Or Replacement

Water Heater Repair Or Replacement By Leone PlumbingThe water heater is an essential appliance that we use almost every day in the kitchen, shower, and laundry. We need it most especially during the winter to keep us warm. But what would you do if your water heater is no longer heating up or if it is leaking? Would you go with water heater repair or replace the whole unit? What are the things you need to know before deciding?
Life Expectancy Of A Water Heater

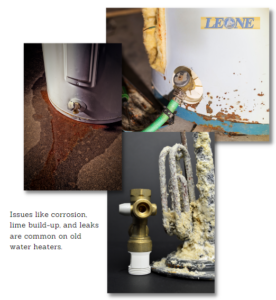
Knowing the age of your water heater can help you decide whether to replace the unit or go on with the repair. Usually, a water heater may last up to 12 years depending on how it is maintained. The unit can be prone to leaking and tends to be working inconsistently if it is more than 10 years old. However, a professional plumber can extend the life of the unit through simple repairs like replacing the pressure relief valve. It may save you from buying a new water heater.

When Is Water Heater Repair Necessary?

Leone Plumbing water heater repair serviceLooking out for the following red flags can help you determine if your water heater needs repair. If you are experiencing these signs, it is best to contact a professional plumber.
Water Is No Longer Heating
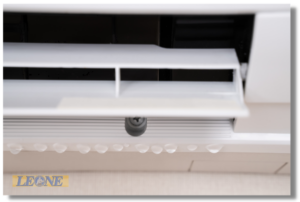
Over time, lime sediments may build up inside the tank reducing the capacity of the water heater. The accumulated build-up of sediments reduces the available water to be heated.
Rusty Water
The corrosion inside the tank may become obvious through the water that is coming out from the unit. If you can find rust in your water, it is an indication that the water heater is breaking down inside due to corrosion.
Leaking Water
Check the seams and joints of your water heater regularly if there are any leaks. The appliance is designed to be a tight or closed system and moisture outside of it means something is wrong inside. Persisting leaks on your unit call for a water heater repair.
Unusual Noise
If your water heater is making a rumbling noise while in operation, it means that the system is struggling to work properly. Something might be interfering with the water heater and preventing it from working normally. Hearing this odd noise indicates that your water heater needs to be checked and repaired immediately.

When To Buy A New Water Heater?

If your water heater is more than 10 years old and beyond repair, then it’s time to get a new one. If you are not sure about the age of the unit, look for it’s brand and serial number then check with the InterNACHI resource to find out. Before purchasing a new water heater, think about the following.
Gallon Capacity and Recovery Rate
Find out the number of gallons the heater can heat on an hourly basis.
Actual Dimension
You need an accurate measurement of the area where you will put the unit. Get the exact height and width.
Look for the Efficiency Rating
You can save energy and money with high-efficiency water heater units. Look for the sticker (usually on the side) that lists the estimated operational cost of the unit.

Need A Water Heater Repair or Installation Service?

We always have you covered! We are Rochester New York’s best plumbers and we are here for your water heater repair or installation. Contact us and we’ll talk to you soon!
Read More

What Makes My Air Conditioner Water Leaking?

Causes air conditioner water to leak and what can be done about it. A leaking air conditioner is a very unsettling issue to handle. Looking at your air conditioner water leaking on the floor is such a messy sight. It adds to the discomfort given by the hot summer weather! Why is your air conditioner water leaking and what can be done about it?
Common Causes of Air Conditioner Water Leaking

Common causes of air conditioner water leakTo handle the issue of air conditioner water leaking, you have to be aware of the following causes.

Deteriorating Pipes
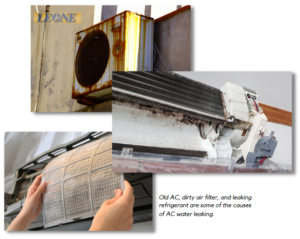
How old is your AC? Old deteriorating pipes may cause the AC water to leak. One possibility is that the pipes are not actually leaking and instead, condensation is forming on the pipes because the insulating cover has deteriorated. Purchasing a new cover would solve this problem. If the water is still dripping despite replacing the pipe cover, it’s possible that the leak isn’t condensation but an underlying problem with the pipe itself. In this case, it would be best if you contact a professional plumber to inspect and fix the problem.
Unwashed or Greasy Air Filters
The AC’s airflow can be blocked if the air filters are dirty. It hampers the air to get into the evaporator coil until it becomes cold and freezes. Eventually, the frozen water would melt excessively causing it to leak indoors. It’s better to replace the air filter if it’s filthy!
Clogged Drainage
Always remember that water will always find its way to get out. Dirt and dust collected on the drainage can block the water. To avoid this problem, make it a habit to regularly check the AC drainage for any clogs that block the water flow. If the issue keeps on persisting after cleaning the drainage, then it’s time to seek help from a professional.
Leaky Refrigerant
The refrigerant is one important component of an AC that converts warm air into cool air. If there is a gurgling or hissing sound coming from the indoor unit, and when the AC is not blowing cool air as it should be, these can be signs that you have a leaky refrigerant. A refrigerant leak is not only harmful to your health but also to the environment. It’s best to contact a professional to deal with this issue.
Incorrect AC Installation
Water from your AC may leak if the unit is installed unevenly. AC water may flow indoors causing unpleasant puddles. If your AC is unevenly installed, contact a professional plumber to place your AC correctly.

Leone Plumbing Air Conditioner Water Leaking Repair ServiceDo You Need Help Fixing Your AC Water Leaking?

If you need a hand to fix your AC water leaking, contact us and our team of professionals is here to help! We are Rochester New York’s best plumbers. We commit to providing quality service for all your plumbing needs.    
Read More