Saving Your Home from Corroded Pipes

Leone Plumbing corroded pipes repair serviceAre you aware that corroded pipes could be silently damaging your home? If left unchecked, corroded pipes can lead to costly repairs, cause water leaks, and even create potential health hazards. That’s why early detection and proper maintenance of your plumbing system are crucial. In this article, we will share expert tips on how you can save your home from the perils of corroded pipes.

The Importance Of Early Detection And Proper Maintenance For Home Pipes

Maintaining the integrity of your home’s plumbing system is essential to protect your investment and ensure the comfort and safety of your family. Corroded pipes can wreak havoc on your property, leading to a host of issues that can be both financially and emotionally draining. By taking proactive measures and staying vigilant, you can save your home from the damaging effects of corroded pipes. Corrosion occurs when metal pipes interact with various factors such as water, chemicals, and even the soil surrounding them. Over time, this interaction leads to a breakdown of the pipe’s structure, causing leaks, reduced water pressure, and potential health risks due to contaminated water. Early detection is key to minimizing the extent of damage and preventing further complications.

Proper maintenance is equally important in ensuring the longevity of your plumbing system. Regular inspections, routine maintenance, and prompt repairs are essential to prevent corrosion from taking hold and causing significant damage. By investing time and effort in early detection and proper maintenance, you can save yourself from the headaches and financial burden associated with corroded pipes.

Common Causes Of Pipe Corrosion

Understanding the root causes of pipe corrosion is essential in preventing and managing this destructive issue. Various factors contribute to the corrosion of pipes, including:

Age of Your Home
Older homes often have plumbing systems that are more susceptible to corrosion due to the materials used at the time of construction. Galvanized steel pipes, commonly found in older properties, tend to corrode more rapidly than newer materials such as copper or PEX.
Water Quality
The quality of the water flowing through your pipes can significantly impact their lifespan. High levels of acidity, alkalinity, or mineral content can accelerate the corrosion process. Additionally, water with high chloride or sulfate levels can be particularly corrosive to certain metals.
Chemicals and Environmental Factors

Exposure to harsh chemicals, such as cleaning agents or fertilizers, can corrode pipes over time. Environmental factors, such as high humidity or soil acidity, can also contribute to accelerated corrosion rates.

Signs of Corroded Pipes

Now that you’re aware of the causes, let’s explore the telltale signs that indicate your pipes may be corroded. Early detection of corroded pipes is crucial in preventing further damage and costly repairs. By being aware of the following signs, you can proactively address any issues before they escalate:

Discolored Water

If you notice a change in the color of your tap water, such as brown or yellowish tones, it could be an indication of corroded pipes. The presence of rust or other contaminants in the water is a clear sign that your pipes are deteriorating.

Low Water Pressure

Reduced water pressure can be a result of corroded pipes. As the pipes degrade, they become narrower, restricting the flow of water. If you’re experiencing consistently low water pressure throughout your home, it’s worth investigating the condition of your pipes.

Frequent Leaks

Corroded pipes are more prone to developing leaks. If you notice recurring leaks in your plumbing system, it’s a strong indication that the pipes are deteriorating and in need of attention. Ignoring these leaks can lead to extensive water damage and mold growth.

Preventive Maintenance Tips For Pipe Longevity

Proactive maintenance is key to preventing pipe corrosion and extending the lifespan of your plumbing system. Here are essential tips for maintaining healthy pipes:

  1. Regular Cleaning: Flush your pipes periodically by running hot water through them to remove any built-up sediment or debris. This simple maintenance practice helps prevent corrosion-causing particles from accumulating and damaging your pipes.
  2. Water Softening: If your water supply has a high mineral content, consider installing a water softener. Water softeners remove excess minerals that can contribute to pipe corrosion, thereby protecting your plumbing system.
  3. Avoid Harsh Chemicals: Be mindful of the cleaning agents and chemicals you use in your home. Harsh chemicals can corrode pipes over time. Opt for environmentally friendly alternatives and avoid pouring corrosive substances down drains or toilets.

Implementing these preventative measures can significantly reduce the risk of pipe corrosion. However, in cases where corrosion has already taken hold, repair or replacement may be necessary.

Replacing Corroded Pipes

In severe cases of corrosion, pipe replacement may be the most suitable solution. This involves removing the corroded pipes and installing new ones made from materials resistant to corrosion. When it comes to pipe replacement, selecting the right materials is crucial for long-term durability and corrosion resistance. Here are two widely used options:

  1. Copper Pipes: Copper pipes have long been a popular choice due to their excellent corrosion resistance and durability. They are suitable for both hot and cold water supply lines and have a proven track record of reliability.
  2. PEX Pipes:  Cross-linked polyethylene (PEX) pipes are gaining popularity for their flexibility, ease of installation, and resistance to corrosion. PEX pipes are highly durable and suitable for both residential and commercial applications.

Hiring A Professional Plumber For Pipe Maintenance And Repairs

While DIY methods and proactive maintenance play a crucial role in preventing pipe corrosion, there are situations where professional expertise is necessary. Hiring a professional plumber offers several benefits:

  1. Expert Knowledge: Professional plumbers possess specialized knowledge and experience in identifying, addressing, and preventing pipe corrosion. Their expertise ensures accurate assessments and effective solutions for your plumbing system.
  2. Time and Cost Savings: Engaging a professional plumber saves you time and money in the long run. Their efficient repairs and proactive maintenance help prevent extensive damage and costly repairs down the line.
  3. Peace of Mind: By entrusting your plumbing system to a professional, you can have peace of mind knowing that your pipes are in capable hands. Professional plumbers adhere to industry standards and deliver quality workmanship.
How Leone plumbing deal with corroded pipes issue As Rochester, New York’s best plumbers, it is our goal to help you protect your home and your business from the perils of corroded pipes. We provide the right solution for your plumbing pipe maintenance and repair concerns. Don’t wait for problems to arise – start protecting your home today! Contact us and schedule an appointment.  
Read More

How Hydro Jetter Plumbing Technology is Revolutionizing the Industry

Leone Plumbing hydro jetter plumbing servicesIn the ever-evolving world of plumbing, advancements in technology continue to revolutionize the industry and provide more efficient and effective solutions for both plumbers and homeowners alike. One such breakthrough is the emergence of hydro jetter plumbing technology, a powerful tool that is changing the way plumbing professionals tackle tough clogs and blockages.

How Do Hydro Jetter Plumbing Works?

Hydro jetters utilize high-pressure water streams to dislodge and remove stubborn debris, grease, and sediment from pipes, ensuring optimal flow and preventing future plumbing issues. With their ability to clean pipes thoroughly and efficiently, hydro jetters are quickly becoming a game-changer for plumbers, eliminating the need for traditional methods that may be less effective and time-consuming. Not only does hydro jetter technology offer better results, but it also minimizes the need for harsh chemicals, making it an environmentally friendly choice. As a result, homeowners can enjoy clean, clear pipes without worrying about the negative effects of chemical cleaners on their plumbing systems or the environment.

The Benefits Of Hydro Jetter Technology In Plumbing

Hydro jetter technology has brought about numerous benefits to the plumbing industry. One of the key advantages is its ability to thoroughly clean pipes, ensuring optimal flow and preventing future plumbing issues. Traditional methods, such as snaking or using chemical cleaners, may only provide temporary relief from clogs and blockages. However, hydro jetters, with their high-pressure water streams, can dislodge and remove even the toughest debris, grease, and sediment that accumulate in pipes over time.

Another significant benefit of hydro jetter technology is its environmental friendliness. Unlike chemical cleaners that can be harmful to both the plumbing system and the environment, hydro jetters rely solely on the power of water. This not only eliminates the need for harsh chemicals but also reduces the risk of chemical residue remaining in the pipes. Homeowners can enjoy clean, clear pipes without worrying about the negative effects on their plumbing system or the environment.

The Role Of Hydro Jetter Plumbing Technology In Preventing And Resolving Plumbing Issues

Hydro jetter technology plays a crucial role in both preventing and resolving plumbing issues. Regular maintenance using hydro jetters can prevent the buildup of debris, grease, and sediment in pipes, reducing the likelihood of clogs and blockages in the future. By thoroughly cleaning the inside of pipes, hydro jetters ensure optimal flow and prevent the accumulation of materials that can hinder the plumbing system’s performance. In resolving plumbing issues, hydro jetters offer a more effective solution compared to traditional methods. Whether it’s a stubborn clog or a blockage caused by grease or sediment, hydro jetter technology can dislodge and remove the obstruction, restoring the flow of water in the pipes. Furthermore, hydro jetters can clean the entire length of the pipe, eliminating any residue or debris that may contribute to recurring issues.

Hydro Jetter Technology Improves The Efficiency And Cost-Effectiveness of Plumbing Services

Hydro jetter technology has significantly improved the efficiency and cost-effectiveness of plumbing services. In the past, clearing stubborn clogs or blockages often required multiple attempts using traditional methods, resulting in increased labor costs and prolonged inconvenience for homeowners. However, with hydro jetter technology, plumbers can quickly and effectively remove obstructions, reducing the time required for each job.

The improved efficiency provided by hydro jetters allows plumbers to serve more clients in a shorter amount of time, increasing their productivity and revenue. Additionally, hydro jetters offer a more long-lasting solution compared to traditional methods, reducing the likelihood of recurring plumbing issues and the need for frequent call-backs. This saves both plumbers and homeowners from the hassle and additional expenses associated with repeated plumbing problems.

The Future Of Hydro Jetter Technology In Plumbing

As technology continues to advance, the future of hydro jetter technology in the plumbing industry looks promising. Manufacturers are constantly improving the design and functionality of hydro jetters, making them more efficient, durable, and user-friendly. This opens up opportunities for plumbing professionals to provide even better services to their clients.

The integration of smart technology into hydro jetter equipment is also a possibility in the future. This may include features such as remote operation, real-time monitoring of water pressure and flow, and automated nozzle selection based on the specific requirements of each job. Such advancements would further enhance the efficiency and effectiveness of hydro jetting, allowing plumbers to deliver exceptional results with ease.

Hydro jetter technology is revolutionizing the plumbing industry by providing more efficient and effective solutions for plumbing challenges. Its ability to thoroughly clean pipes, minimize the need for harsh chemicals, and prevent recurring issues makes it a game-changer for both plumbers and homeowners. The future of hydro jetter technology looks bright, with advancements on the horizon that will further improve its efficiency and eco-friendliness. Plumbing professionals who embrace this transformative technology are well-positioned to thrive in an ever-evolving industry.

Experience The Efficiency And Cost-Effectiveness of Hydro Jetter Technology!

Hydro jetters utilize high-pressure water streams to dislodge and remove stubborn debris, grease, and sediment from pipes, ensuring optimal flow and preventing future plumbing issues. Unlike traditional methods such as snaking or using chemical cleaners, hydro jetting provides a more thorough and long-lasting solution. Whether it’s a simple clog or a more complex blockage, hydro jetters can handle a wide range of plumbing challenges. From residential homes to commercial buildings, this technology can effectively tackle the toughest problems, saving time and money! So if you are looking for expert plumbers who can perform hydro jetting, contact us anytime to book an appointment.      
Read More

DIY Guide On How To Relight A Pilot Light On Your Water Heater

how to relight pilot light on water heater instructions by Leone PlumbingIs your water heater producing lukewarm or cold water? Before you pick up the phone to call a professional, you might be able to fix the problem yourself. In this DIY guide, we’ll show you how to relight the pilot light on your water heater step by step. With just a few simple tools and a little know-how, you can potentially save yourself time and money. In this comprehensive guide, we’ll cover everything you need to know, from identifying whether your pilot light is out to safely relighting it.

Signs That Your Water Heater Pilot Light Needs Relighting

Before you figure out how to relight a pilot light on the water heater you need to observe the signs. Here are some common signs that your pilot light may be out and needs relighting:

1. No hot water:

If you turn on the hot water tap and only get cold or lukewarm water, it’s likely that your pilot light is out. Without a working pilot light, the burner won’t ignite, resulting in no hot water.

2. Pilot light won’t stay lit:

If you’ve noticed that your pilot light keeps going out, even after relighting it, there may be an underlying issue causing the flame to extinguish. This could be due to a faulty thermocouple or a problem with the gas supply.

3. Gas smell:

If you detect a strong odor of gas near your water heater, it’s crucial to act quickly. A gas leak can be hazardous, so turn off the gas supply and ventilate the area immediately. In this case, do not attempt to relight the pilot light yourself and call a professional right away.

Important Note To Remember: 

These signs indicate that you may need to relight your pilot light, but it’s essential to follow the proper safety precautions before attempting to do so.

Safety First Before You Relight The Pilot Light On Your Water Heater

Before you begin the process of relighting your water heater pilot light, it’s crucial to take the following safety precautions:

1. Turn off the gas supply:

Locate the gas shut-off valve near your water heater. Turn the valve to the “off” position to cut off the gas supply. This step is crucial to prevent any gas leaks or accidents while you work on relighting the pilot light.

2. Allow time for gas to dissipate:

After turning off the gas supply, it’s important to allow some time for any remaining gas to dissipate. Open windows or doors to ventilate the area and ensure there are no lingering gas fumes.

3. Read the manufacturer’s instructions:

Each water heater may have slightly different instructions for relighting the pilot light. Take the time to read the manufacturer’s instructions carefully to ensure you understand the process and any specific safety considerations.

Step-by-step Guide To Relighting A Water Heater Pilot Light

Now that you’ve taken the necessary safety precautions, let’s dive into the step-by-step process of relighting your water heater pilot light:

Step 1: Access the pilot light assembly

First, locate the access panel on your water heater. This panel is typically located near the bottom of the unit. Next, remove the panel by unscrewing or lifting it, depending on the type of water heater you have. Once the panel is removed, you should have clear access to the pilot light assembly.

Step 2: Locate the pilot light and gas control knob

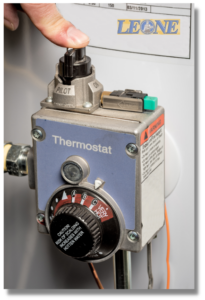
Look for the gas control knob on the front of the water heater. This knob is usually labeled and will have settings such as “on,” “off,” and “pilot.” Then set the gas control knob to the “off” position. This ensures that the gas supply to the pilot light is shut off.

Step 3: Wait for the gas to dissipate

After turning the gas control knob to the “off” position, give the gas a few minutes to dissipate. This will help ensure there are no lingering gas fumes when you relight the pilot light.

Step 4: Locate the pilot light

Look for the pilot light assembly near the bottom of the water heater. It usually consists of a small tube with a metal tip. Next, locate the pilot light orifice, which is a small opening where the gas is released to ignite the flame.

Step 5: Light the pilot light

With a long-reach lighter or fireplace match in hand, carefully bring the flame close to the pilot light orifice. While holding the flame near the orifice, turn the gas control knob to the “pilot” position. Press the knob down and hold it in this position to allow gas to flow to the pilot light. Continue to hold the knob down while you ignite the gas by bringing the flame closer to the orifice. Once the pilot light is lit, continue holding the knob down for about 20-30 seconds to ensure the flame stays lit. After 20-30 seconds, release the knob and the pilot light should remain lit.
Step 6: Test the pilot light

Turn the gas control knob to the “on” position. Then, return the access panel to its original position and secure it. Wait for a few minutes for the water heater to heat up. Lastly, turn on a hot water tap to check if the hot water is flowing consistently. If the water is hot, then the pilot light is successfully relit.

Disclaimer:

While it is a good idea to do things DIY, it can be a dangerous task for people who are not experienced. We recommend having a licensed and insured technician assist with this job.

When To Call A Professional For Help With Relighting The Pilot Light

Good job if you were able to successfully relight your water heater pilot light on your own. However, if you encounter any issues during the process or if the pilot light continues to go out, there may be underlying problems that require professional assistance. If things get out of hand, it’s time to pick up the phone and call an expert plumber to fix the issue. So don’t look anywhere! Call Rochester New York’s best plumbers to help you. Contact us right away if you need help in fixing your water heater.
Read More

The Advantages and Process of Drain Camera Inspection Services

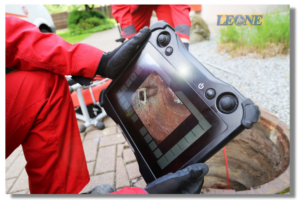
Leone Plumbing drain camera inspection services in Rochester New YorkWhen it comes to plumbing issues, finding the root cause can often be a challenge. That’s where drain camera inspection services come in. By peering into the depths of your pipes with the help of advanced camera technology, these services offer a clear view of what’s happening underground. Using state-of-the-art equipment, drain camera inspections provide homeowners and businesses with a thorough assessment of their plumbing systems. This advanced approach allows for quicker identification of clogs, leaks, and other potential problems, saving time and money in the long run. By combining cutting-edge technology with expert analysis, these services empower individuals to make informed decisions about their plumbing systems, leading to more efficient and cost-effective solutions.
The Advantages Of Drain Camera Inspection Services

Drain camera inspection services offer several advantages over traditional plumbing diagnostic methods.

Provide Accurate And Precise Results

Firstly, they provide accurate and precise results. The high-resolution cameras used in drain camera inspections capture clear images and videos of the inside of pipes, allowing professionals to identify the exact location and nature of the problem. This eliminates the guesswork involved in traditional diagnostic approaches and ensures that the correct solution is implemented from the start.

Eliminate Invasive Procedures

Secondly, drain camera inspections eliminate the need for invasive procedures like digging or tearing down walls. In the past, diagnosing plumbing issues often required destructive methods, resulting in additional costs and inconvenience for homeowners. With drain camera inspection services, professionals can visually inspect the pipes without causing any damage to the property. This non-invasive approach not only saves time and money but also minimizes disruption to the daily lives of individuals.

Provide Thorough And Accurate Diagnostics

The detailed images and videos captured during drain camera inspections provide transparency and thorough documentation. Homeowners and businesses can view the real-time footage or saved recordings, allowing them to see the condition of their pipes firsthand. This transparency builds trust between the service provider and the customer and ensures that all parties involved have a clear understanding of the problem and its solution. Additionally, the documented evidence can be useful for insurance claims or future reference.

Common Issues Detected By Drain Camera Inspections

Drain camera inspections are capable of identifying a wide range of plumbing issues that may not be easily detectable through other means. Some of the most common issues detected by these inspections include:

1. Clogs:

Drain camera inspections can pinpoint the exact location and cause of clogs within the pipes. Whether it’s a buildup of grease, hair, or foreign objects, the camera provides a clear view of the obstruction, enabling professionals to determine the most appropriate method of removal.

2. Leaks:

Pipe leaks can be difficult to detect, especially if they are hidden behind walls or underground. Drain camera inspections allow for visual confirmation of leaks, helping professionals identify the extent of the damage and plan the necessary repairs.

3. Cracks and Damage:

Over time, pipes can develop cracks, fractures, or other forms of damage that may go unnoticed without a drain camera inspection. By examining the interior of the pipes, professionals can identify any structural issues and take appropriate action to prevent further damage or leaks.

4. Root Intrusions:

Tree roots tend to grow towards sources of water, including underground pipes. These root intrusions can cause blockages and damage to the pipes, leading to reduced water flow and potential leaks. Drain camera inspections can detect and locate these root intrusions, allowing for targeted root removal and pipe repair.

5. Misaligned or Collapsed Pipes:

Drain camera inspections can reveal any misaligned or collapsed sections of pipes. This information is crucial for determining the best course of action, whether it’s repairing the affected section or replacing the entire pipe.

The Importance Of Regular Drain Camera Inspection Services

Drain camera inspections involve a systematic process that utilizes specialized equipment and skilled professionals. Scheduling a regular drain camera inspection service is one way that you can prevent the worst plumbing issues or repair those ongoing and recurring problems on your drain. If you are looking for a tested and proven drain camera inspection service in Rochester, New York our team of expert plumbers is ready to help you! Contact us today to book an appointment.
Read More

Bubbles In The Toilet: Is There Something Wrong?

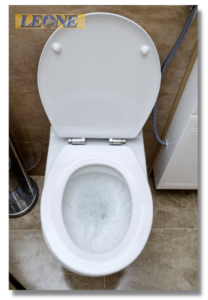
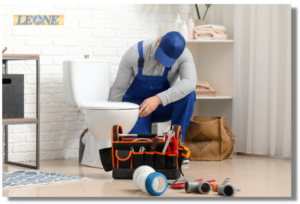
Fixing Bubbles In The Toilet by Leone PlumbingYour toilet can show unusual signs if there is something wrong with it. One sign that you should be concerned about is when you see bubbles in the toilet. If the toilet is bubbling with an unusual gurgling sound after you flush, it could indicate that there is a problem. You should not ignore these signs! Today, let’s discuss why this could be happening and potential solutions.
Why Do I See Bubbles In The Toilet?

There are reasons why you see bubbles in the toilet. If you see this initial sign with unusual rumbling and gurgling noise, then it can be for the following reasons.
Clogged Drains
If the toilet drains or the overflow openings of the toilet are clogged, air won’t flow properly. This occurs because there is no other outlet in addition to the toilet bowl, pressurized gas created by the trapped air comes out as bubbles every time you flush. This issue calls for a service of a professional plumber. A professional plumber can find and remove any objects (large or small) that are clogging the main drain pipe and the overflow openings of your toilet.
Obstruction On The Vent Stack
The vent stack is designed to be open at all times. It regulates air pressure in the plumbing system and releases exhaust gas. If the vent stack is blocked, it will release negative pressure that slows down the draining system. The common obstructions are leaves, twigs, and birds’ nests. You need to contact a professional plumber to inspect and fix the issue.
Clogged Mainline
A clogged mainline can also cause negative air pressure in the pipes which causes the odd toilet bubbling and gurgling. If the clog is in the municipal sewer line, then it is your town’s responsibility and you should not do the repair yourself.
Too Much Air In The Water Tank
If you hear your toilet gurgling every time you fill up your water tank, then it means there is excess air. You will also see bubbles in the toilet because of it. To fix this, you need to open your toilet’s filler valve and let the water drain, then refill it again. In this way, you can get rid of any excess gas inside. If the issue still persists, contact a professional plumber to avoid further complications.

Get Rid Of That Toilet Bubbling And Gurgling!

Do not let yourself be bothered by the gurgling sound and bubbles in the toilet. If your toilet is starting to bubble with a gurgling noise, call us and allow our licensed plumber to help you. Leone Plumbing Professional Fixing Bubbles In The Toilet Conern  
Read More

Different Types Of Slab Leak Repair And What Causes Slab Leaks

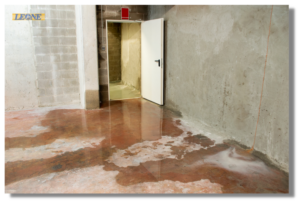
Slab Leak Repair Service By Leone PlumbingA slab is a layer of plain concrete that is used to create flat surfaces like roof decks, ceilings, and floors. It is a thick structure that is supported by beams, columns, walls, or the ground. Sturdy as it may seem, a slab is still vulnerable to leaks. Slab leaks may lead to costly repairs due to water damage and the leaking wastewater can be a health hazard. There is no better solution than slab leak repair. But how is it done? Let’s talk about the different types of slab leak repair and what causes slab leaks.
How Can You Tell That A Home Or Building Needs A Slab Leak Repair?

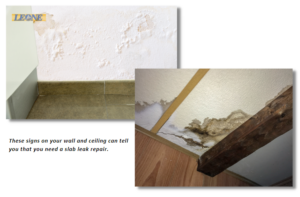
Slab leaks are very common in older homes or buildings since they use galvanized steel pipes or copper which are prone to corrosion. When the pipes deteriorate, it releases water and even sewage under the structure. Faulty installation of pipes is also one of the culprits. Another contributing factor to slab leaks is the natural shifting of soil, underground stream, and even earthquake. The pressure brought by these natural ground movements may cause the lines to break which leads to slab leaks. Since all of these happen underneath, it is very hard to identify a slab leak. However, there are signs to watch out for. The following signs can tell you that you need a slab leak repair. Leone Plumbing Slab Leak Repair Solution
  • Warm spots or water stains on the floor.
  • Foul odor from floors and walls.
  • Cracks on floors, walls, and ceilings.
  • Unusual water puddles around the house or building.
  • Visible soil shifts around the structure.
  • Uneven growth in lawn or foundation plants.

Different Types Of Slab Leak Repair

There are different types of approaches when it comes to slab leak repair. Depending on the impact of the damages, here are some of the different types of slab leak repair.
Slab Replacement
In worst-case scenarios, the entire slab may need to be replaced if the leak caused large damages and if the pipes are in bad condition. This is a very disruptive method and expect that it can affect your regular household or business activities.
Pipe Repair
Pipe repair requires fixing the damaged area of the pipe. This may involve replacing a section of the pipe, patching, or sealing the leak.
Trenchless Repair
A trenchless repair is the least disruptive solution since there is no need to demolish the structure.
Pipe Rerouting
This repair option is ideal if there is difficulty to access the leak and if the pipes are in poor condition. Rerouting bypasses the old pipes by running new pipes alongside them.

Don’t Take Slab Leaks Lightly!

Slab leaks can create serious damage to your property. It can damage the walls, floors, and foundation of your home or building. The longer that it’s left untreated, the more damage it can do! Let our expert plumbers help you with your urgent slab leak repair. Contact us to schedule an appointment.
Read More